-
Pelican Connect
-
- Tips for Evaluating Notifications in the Pelican System
- Thermostat Notification Configurations
- Thermostat Unreachable
- Understanding a “Cool Failure” Notification
- Understanding a “Heat Failure” Notification
- Understanding an “Economizer Position Failure” Notification
- Understanding the “Door or Window Has Been Left Open” Notification
- Understanding Low Battery Notifications for Pelican Devices
-
Admin
-
- Can I pay for multiple site subscriptions at once?
- Can I pay for my subscriptions using a purchase order (PO)?
- How do I change my site type (residential, business, hotel)?
- How do I pay for my site’s subscription?
- What does the Standard Subscription provide?
- What is the Subscription Renewal History?
- Why has my subscription expired?
- How do I view my LTE Gateway Subscription Receipt?
- How do I change my LTE Subscription Email Address?
- How Can I Cancel My LTE Gateway Subscription?
-
Comfort Control
-
- How do I adjust a room temperature?
- How do I turn off all thermostats for an emergency?
- How do I turn ON-OFF cooling?
- How do I turn ON-OFF heating?
- How do I turn ON-OFF the Fan? - not done
- What does Cool Running mean?
- What does Economizer Active mean?
- What does Fan Running mean?
- What does Heat Running mean?
- What does Space Satisfied mean?
- What does Waiting mean?
- Why did cooling start on its own? - not done
- Why did heating start on its own? - not done
-
- Directions on maintaining proper ventilation rates: COVID-19
- What is Outside Ventilation in a schedule?
- Does Pelican adjust an outside damper based on fan speed?
- How do I adjust the CO2 level to generate additional ventilation?
- How do I commission a PEARL for proper ventilation?
- How do I turn off ventilation for all thermostats on a poor outdoor air day?
- What are CO2 Levels?
- What do different CO2 levels indicate ?
- Does Pelican detect CO2 levels as a life safety system?
- How do I adjust my CO2 ventilation configuration?
- What is the Outside Ventilation setting?
-
-
Schedules
- Can I schedule a thermostat to a set points beyond its allowable heat or cool range? - not done
- Can I schedule when Fan Circulation Minutes is active?
- What is unoccupied setback in a thermostat schedule?
- How to set set fan to auto during unoccupied setback periods?
- How do I set an a single thermostat's schedule?
- What is Outside Ventilation in a schedule?
- What are the schedule Repeat options?
- What is optimum start?
- Why did cooling start on its own? - not done
- Why did heating start on its own? - not done
-
- How do I create an event schedule for a single thermostat?
- How do I delete an event scheduled for a single thermostat?
- How do I create an event schedule for multiple thermostats?
- How do I edit a multiple thermostat event scheduled?
- How do I delete a multiple thermostat event scheduled?
- How do I edit an event scheduled for a single thermostat?
-
- How do I create shared schedules? - not done
- How do I edit a shared schedule?
- How do I create unoccupied set point override periods?
- How do I rename a shared schedule?
- How do I copy an existing shared schedule?
- How do I delete an existing shared schedule?
- How do I create an event schedule for multiple thermostats?
- How do I edit a multiple thermostat event scheduled?
- How do I delete a multiple thermostat event scheduled?
-
Thermostat
-
- Can a Pelican thermostat control a floating actuator?
- Can a Pelican thermostat control a two-position actuator?
- Can a Pelican thermostat control a multiple fan speeds?
- Can I "lock-out" compressors based on an outdoor temperature?
- Can I disable or lock a thermostat’s Fan Button?
- Can I disable the thermostat’s internal temperature sensor?
- How do I hide a thermostat on the app?
- How does Pelican assist with freeze prevention?
- How do I control a dual fuel Heat Pump?
- How many Cool Stages do I select for a thermostat?
- How many Fan Stages do I select for a thermostat?
- How many Heat Stages do I select for a thermostat?
- What do I set Heat Needs Fan to?
- What is CO2 Ventilation?
- What is Compressor Lockout?
- What is Cool Range?
- What is Fan Circulation Minutes?
- What is Heat Range?
- What is the difference between Auxiliary and Emergency Heat?
- What should I set a thermostat’s Reversing Valve to?
- What should I set a thermostat’s System Type to?
- What should I set Anticipation Degrees to?
- What should I set Cycles Per Hour to?
- When should I use the thermostat Calibration Degrees?
- What should I set a thermostat’s Zone Controller configuration to?
- What should I set Fan Purge Cycle to?
- What should I set Damper Type to?
- What should I set Reheat Type to?
- What should I set Notification Settings to?
- How to hide a section within an article.
- How can I Delete a Thermostat from a site?
- How do I delete a Wired Temperature Sensor or PEARL Economizer Controller?
- How can I Replace a Thermostat?
- Show all articles ( 18 ) Collapse Articles
-
-
Networking
-
- How do I install a Pelican cellular gateway?
- How do I replace a Pelican Cellular gateway with a Pelican Ethernet gateway?
- Can I set a Pelican gateway for a static IP address?
- Do I need a Public IP address for a Pelican gateway?
- Does a Pelican gateway use a DHCP or static IP address?
- Does a Pelican gateway use Inbound firewall ports?
- How do I change a Pelican gateway from static back to DHCP?
- How do I install a Pelican Ethernet gateway?
-
PEARL
-
Zone Coordinator
-
- Why won’t my zone controller connect?
- What do the lights on the zone controller indicate? - not done
- What does the light on a zone controller's antenna indicate? - not done
- Why is a zone controller unreachable? - not done
- What do the zone controller lights indicate? - not done
- What do the zone controller's antenna lights indicate? - not done
- Zone Controller Dehumidify Sequences
-
- What do the lights on the zone controller indicate? - not done
- TS Thermostat Symbols
- What do the zone controller's antenna lights indicate? - not done
- What do the zone controller lights indicate? - not done
- What does the light on a zone controller's antenna indicate? - not done
- TC Thermostat Symbols
-
- How does Pelican control a parallel fan powered box during a heating cycle?
- How does Pelican control a series fan powered box during a heating cycle?
- How does Pelican control a zone box during a heating cycle?
- How does Pelican control a parallel fan powered box during a cooling cycle?
- How does Pelican control a series fan powered box during a cooling cycle?
- How does Pelican control a zone box during a cooling cycle?
- How does Pelican control a parallel fan powered box during a ventilation cycle?
- How does Pelican control a series fan powered box during a ventilation cycle?
- How does Pelican control a zone box during a ventilation cycle?
-
-
Power Control
- Articles coming soon
-
Sensors
-
OpenAPI
Categories:
Admin
User Management
Managing Users in Your Pelican Site
Effectively managing user access in your Pelican Connect app ensures security and appropriate permission levels. This guide provides clear, step-by-step instructions on how to add and remove users using the Pelican web application.
Adding a New User or Admin
To add a new user or admin, you must have administrative privileges.
Steps to Add a New User:
1
Log into the Pelican App
- Enter your credentials and access your Pelican site.
2
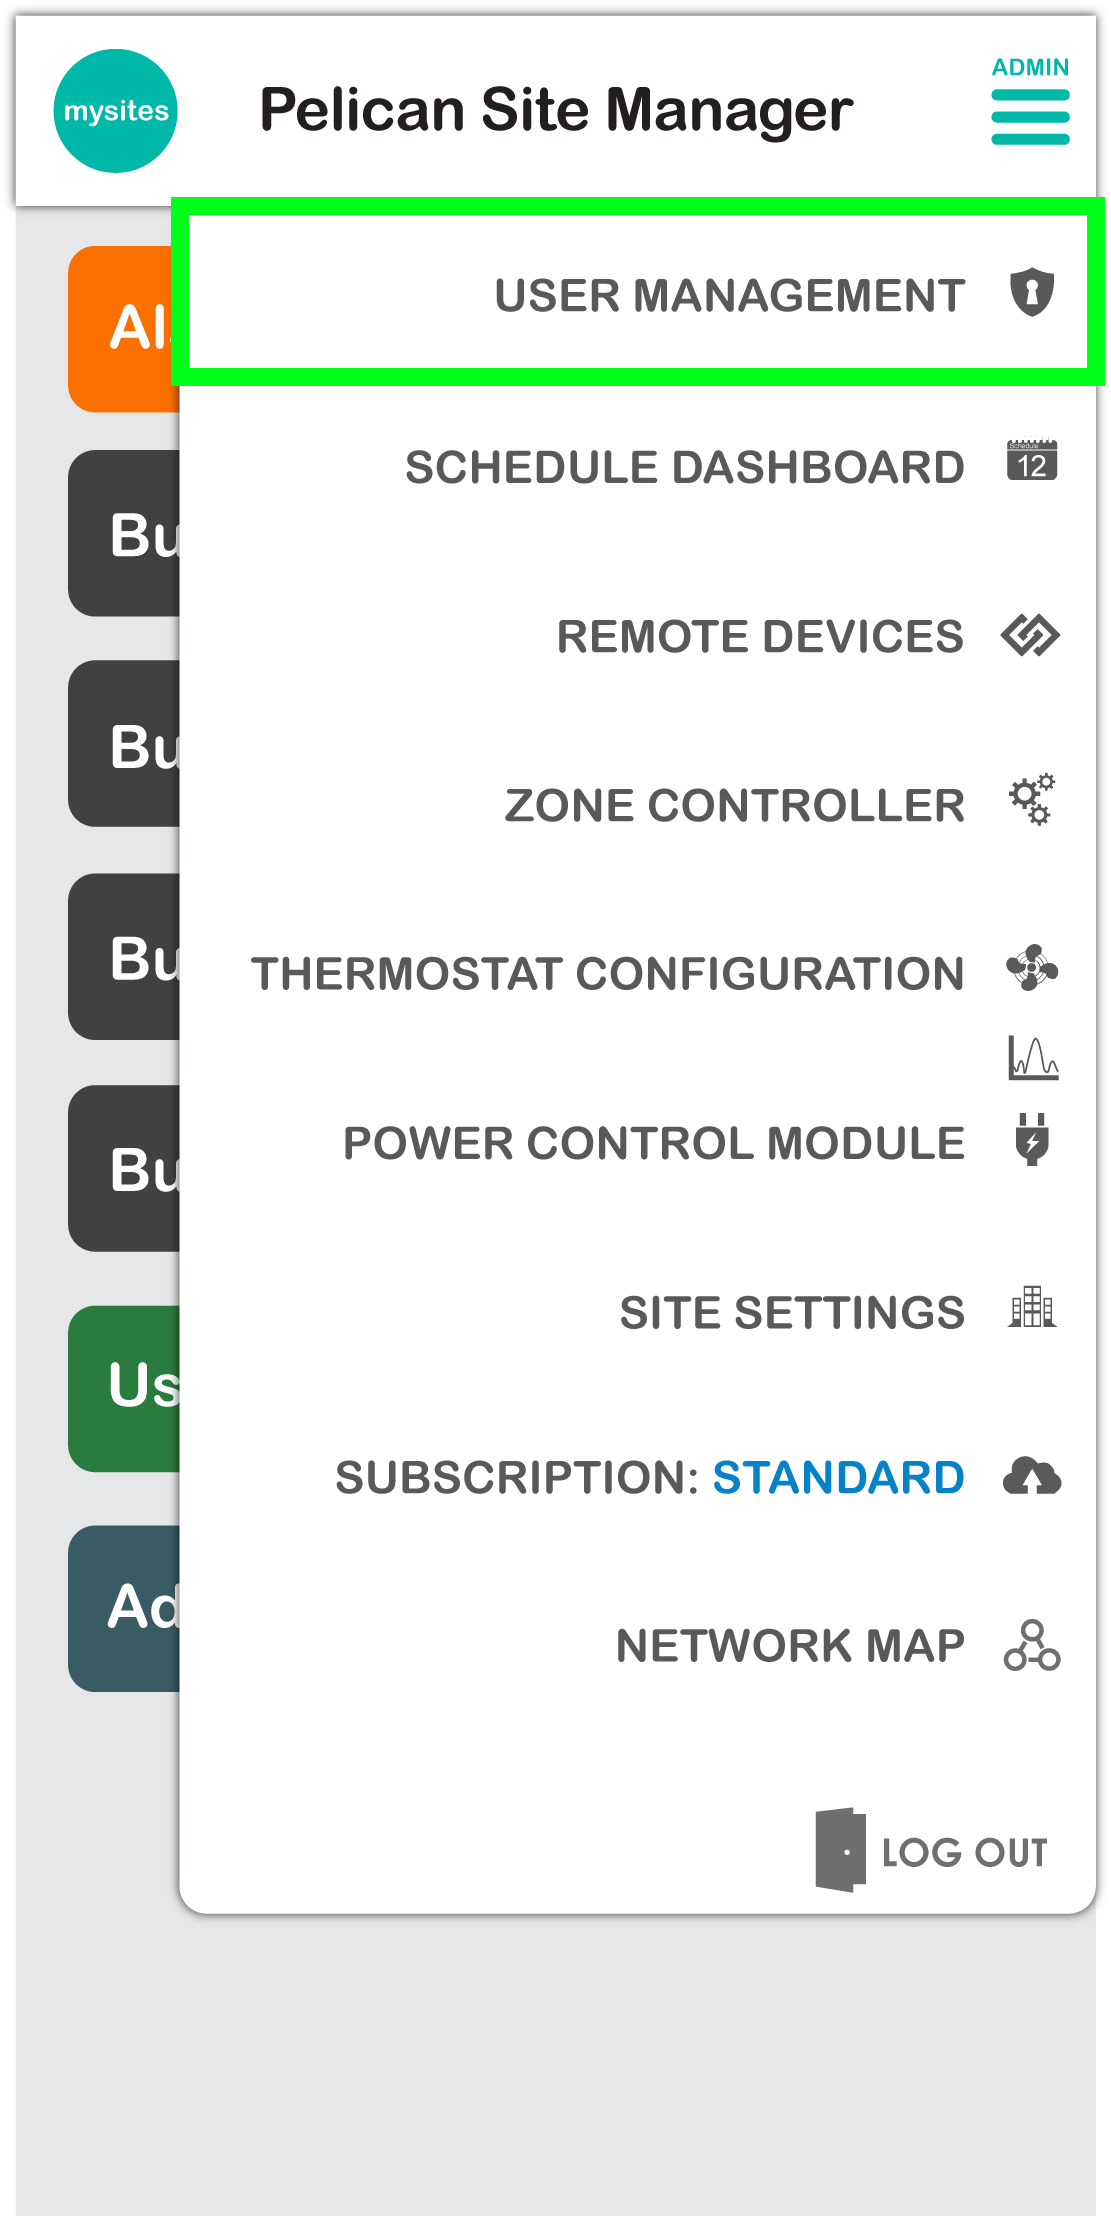
Go to User Management
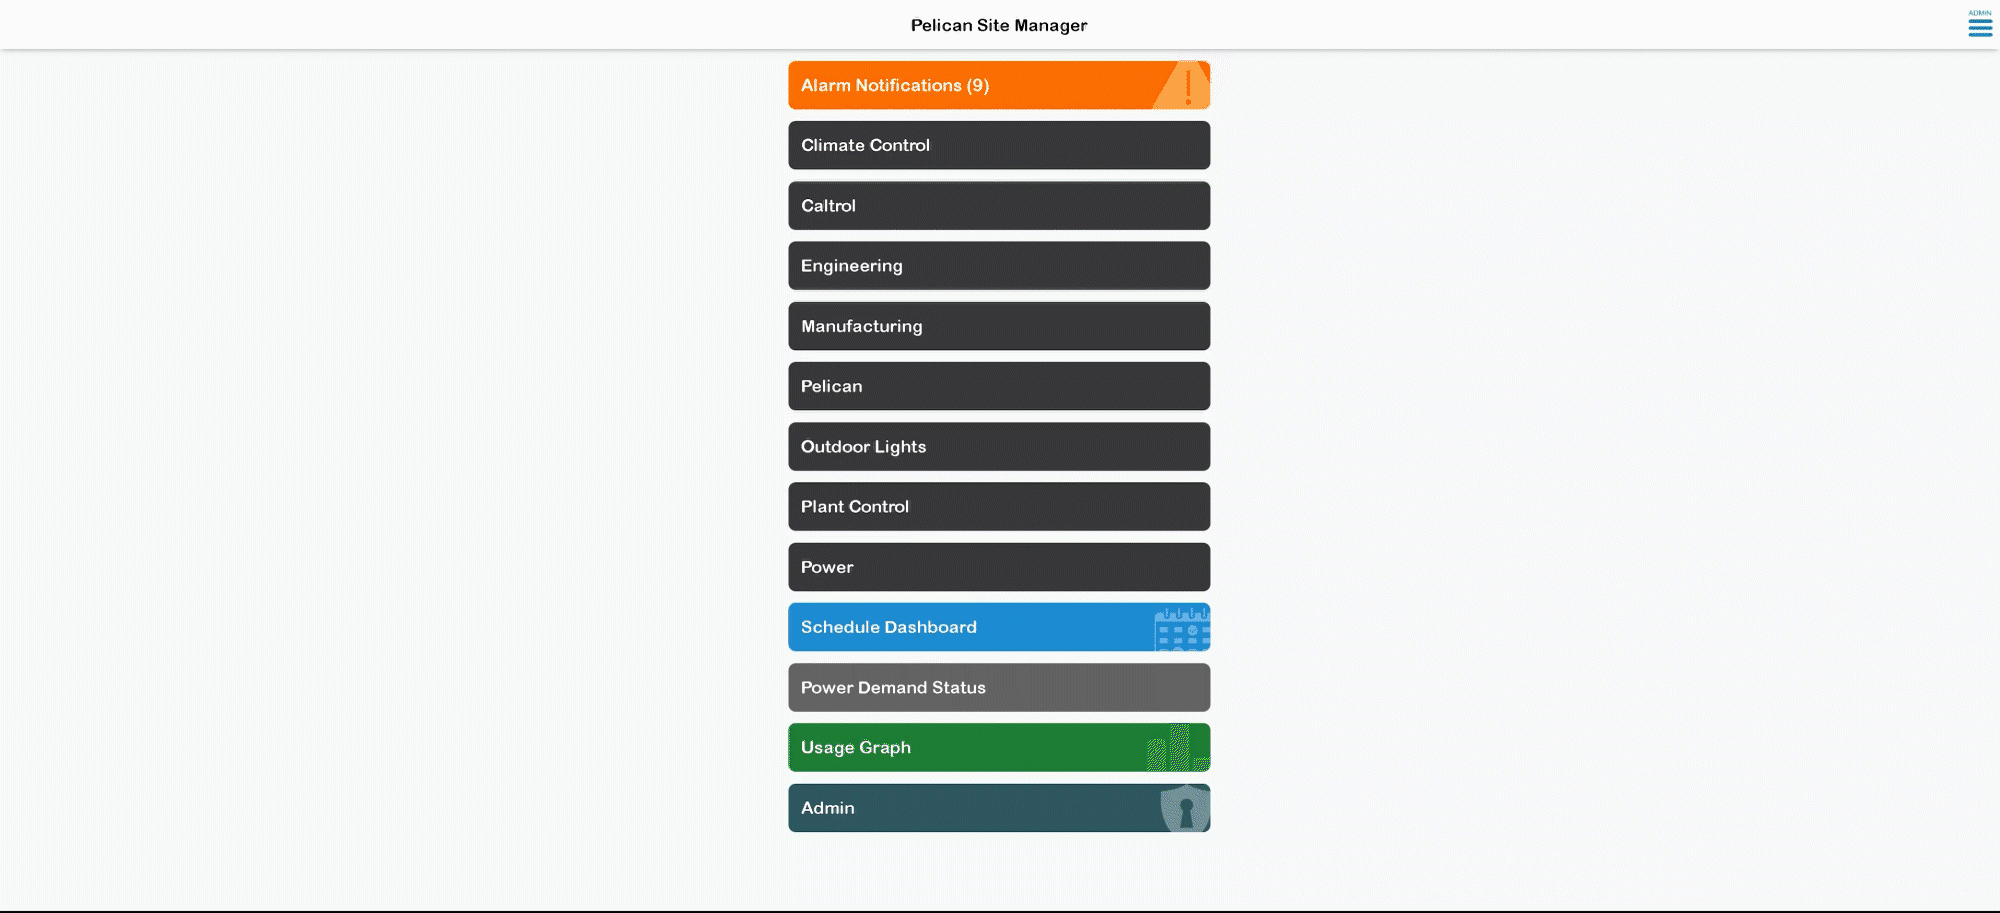
- Click on the Admin tab.
- Select User Management.
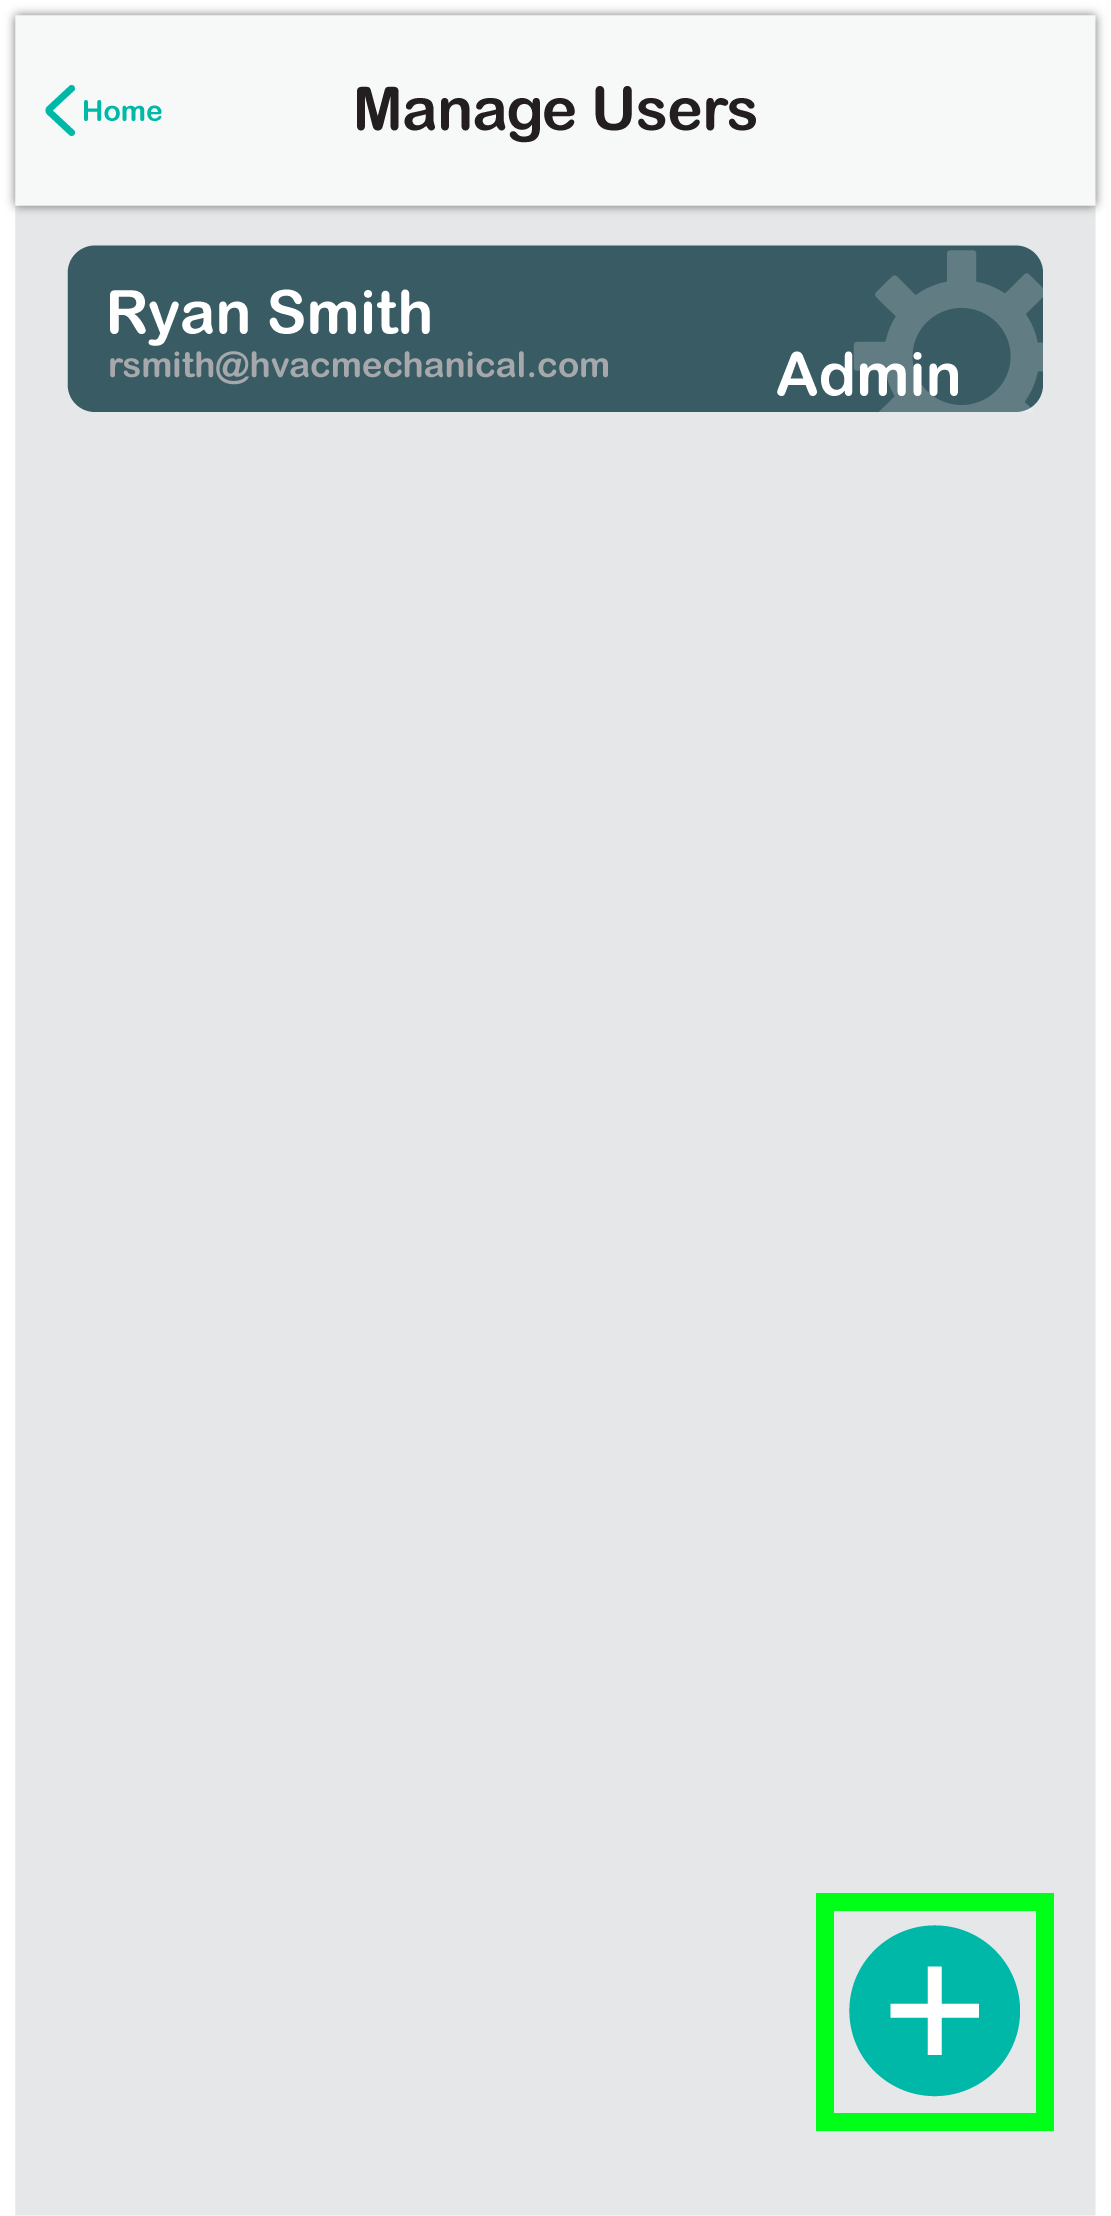
3
Add a New User
- Click the “+” icon at the bottom right of the User Management page.
- Enter the email address and user’s name.
- The system will generate a temporary password for the new user and send it to the email address entered.
Users cannot add or remove other admins or users.
4
Set User Access Rights
| User Options | Description |
|---|---|
| Admin | Grants full access to all Pelican thermostats and the Admin section of the Pelican Connect app. |
| User | Allows limited access based on assigned permissions. |
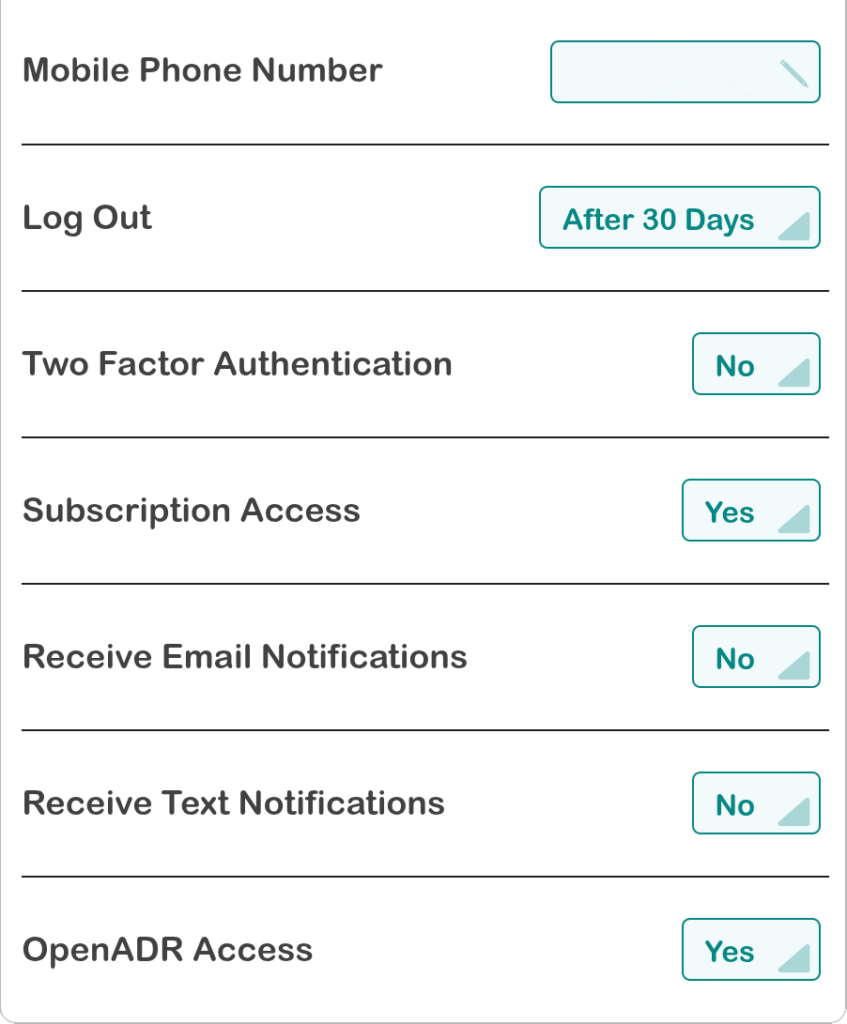
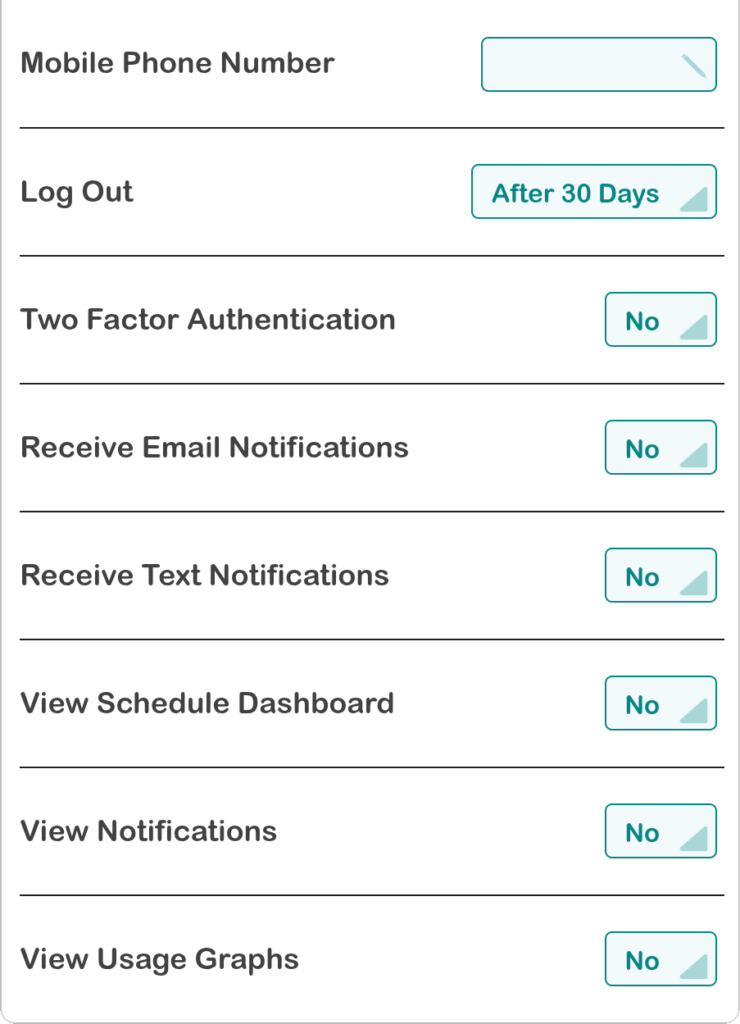
5
Adjust Access Settings (Optional)
| Log Out Behavior | Description |
|---|---|
| On Exit | Logs out immediately when the app is closed. |
| After 1 Day / 30 Days | Stays logged in for the selected period. |
| Never | User remains logged in unless manually logged out. |
| Email Notifications | Description |
|---|---|
| Yes | User receives system notifications via email. |
| No | No email notifications sent. |
| Text Notifications | Description |
|---|---|
| Yes | User receives system notifications via text. |
| No | No text notifications sent. |
| Subscription Access (Admin Only) | Description |
|---|---|
| Yes | View and pay per site subscription. |
| No | No access to subscription management. |
| OpenADR Access (Admin Only) | Description |
|---|---|
| Yes | View and manage utility programs; where available. |
| No | No utility program management. |
| View Schedule Dashboard | Description |
|---|---|
| Yes | View and manage schedules using the Schedule Dashboard. |
| No | No Schedule Dashboard access. |
| View Notifications | Description |
|---|---|
| Yes | View and delete notifications. |
| No | Notifications are hidden. |
| View Usage Graphs | Description |
|---|---|
| Yes | View usage graph information. |
| No | Usage Graphs are hidden. |
Removing a User from Your Pelican Site
Only administrators can delete users.
Steps to Remove a User:
1
Log into the Pelican App
- Enter your credentials and access your Pelican site.
2
Go to User Management
- Click on the Admin tab.
- Select User Management.
3
Delete the User
- Locate and select the user you want to remove.
- Click the delete button at the top right of the screen.
- Confirm the deletion when prompted.
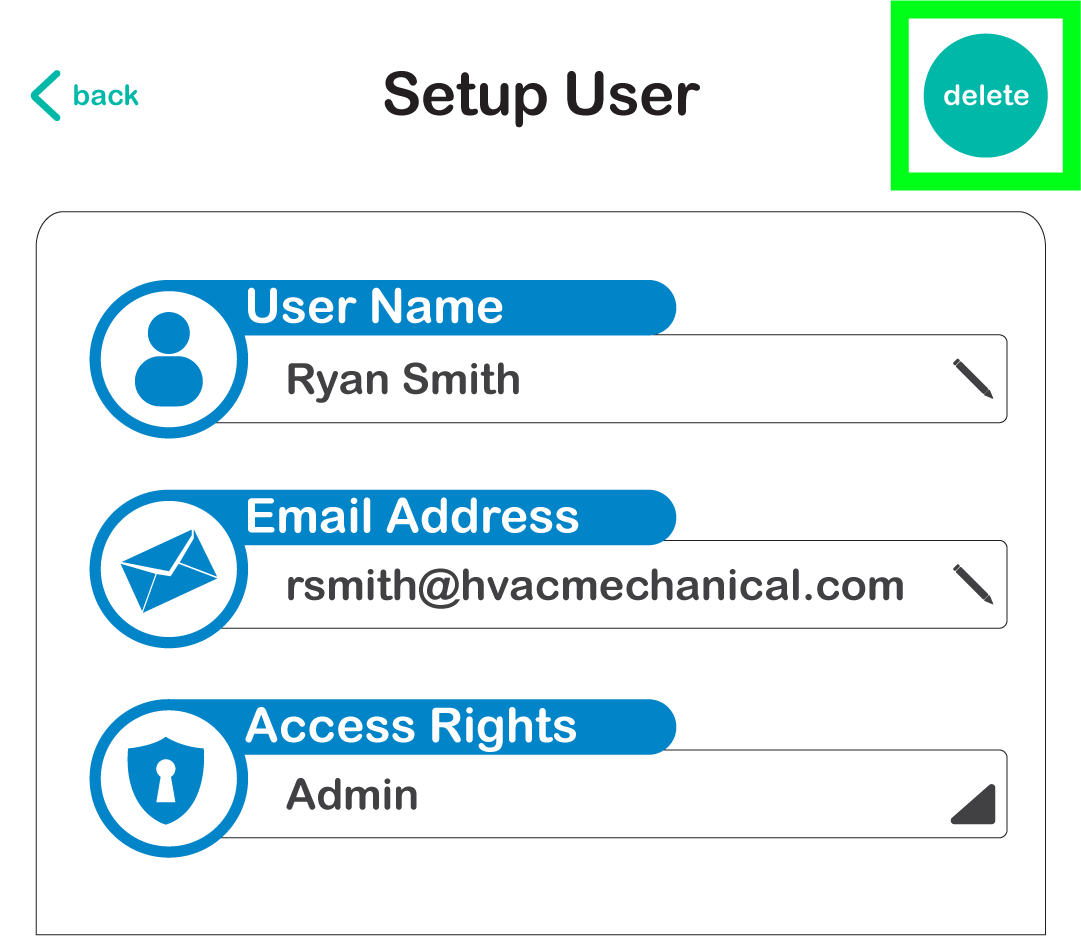
If needed, you can re-add a deleted user to the site at any time.
By following these steps, you can efficiently add and remove users from your Pelican site, ensuring secure and appropriate access for all team members.