1. The Pelican solution uses thermostat schedules to provide limited set-point override periods.
2. From the main page of your Pelican app, select the blue button labeled Schedule Dashboard.
3. To create a new schedule for your thermostats go to How do I set an individual room schedule? or How do I share schedules between multiple rooms?
4. To create limited set-point override periods for an existing schedule, find that schedule on your scheduled dashboard and select edit.
5. Under Settings select the day range you want to add limited set-point override periods too.
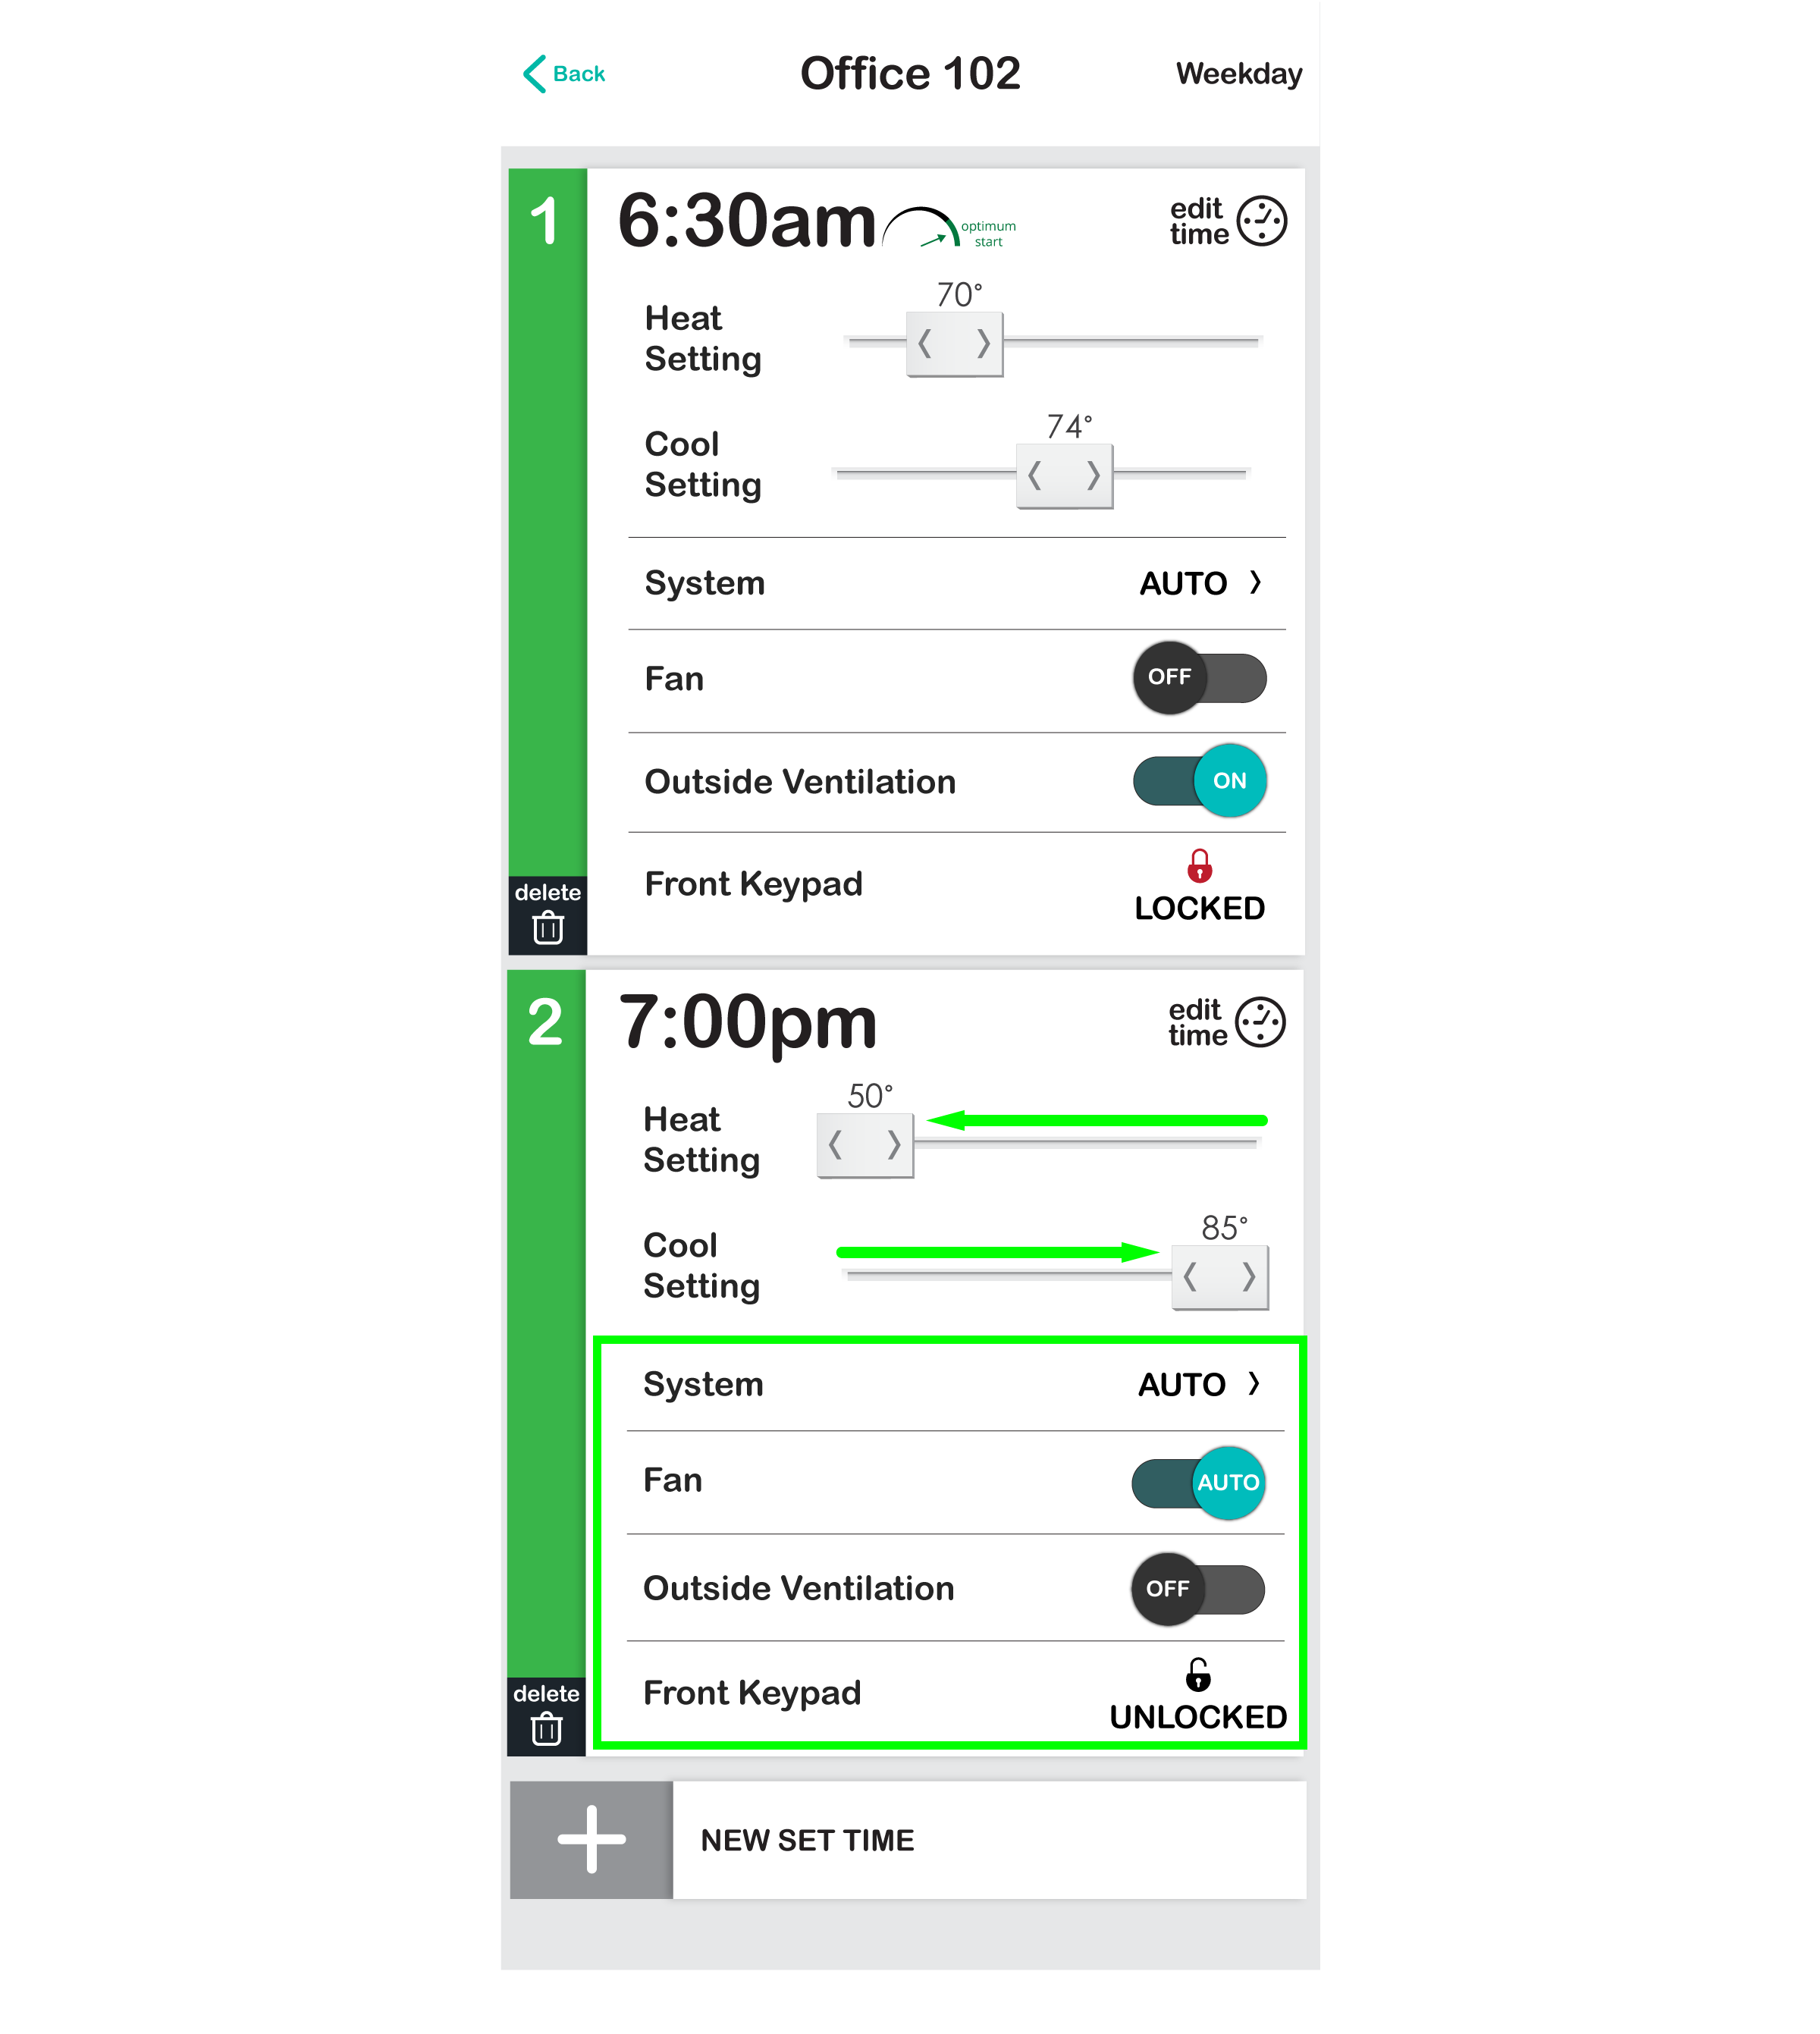
6. You should see Set Times for your schedule similar to below. In our example Set Time 1 is set for 6:30 AM and is when the room becomes occupied and Set Time 2 is set for 7:00 PM and is when the room goes unoccupied.

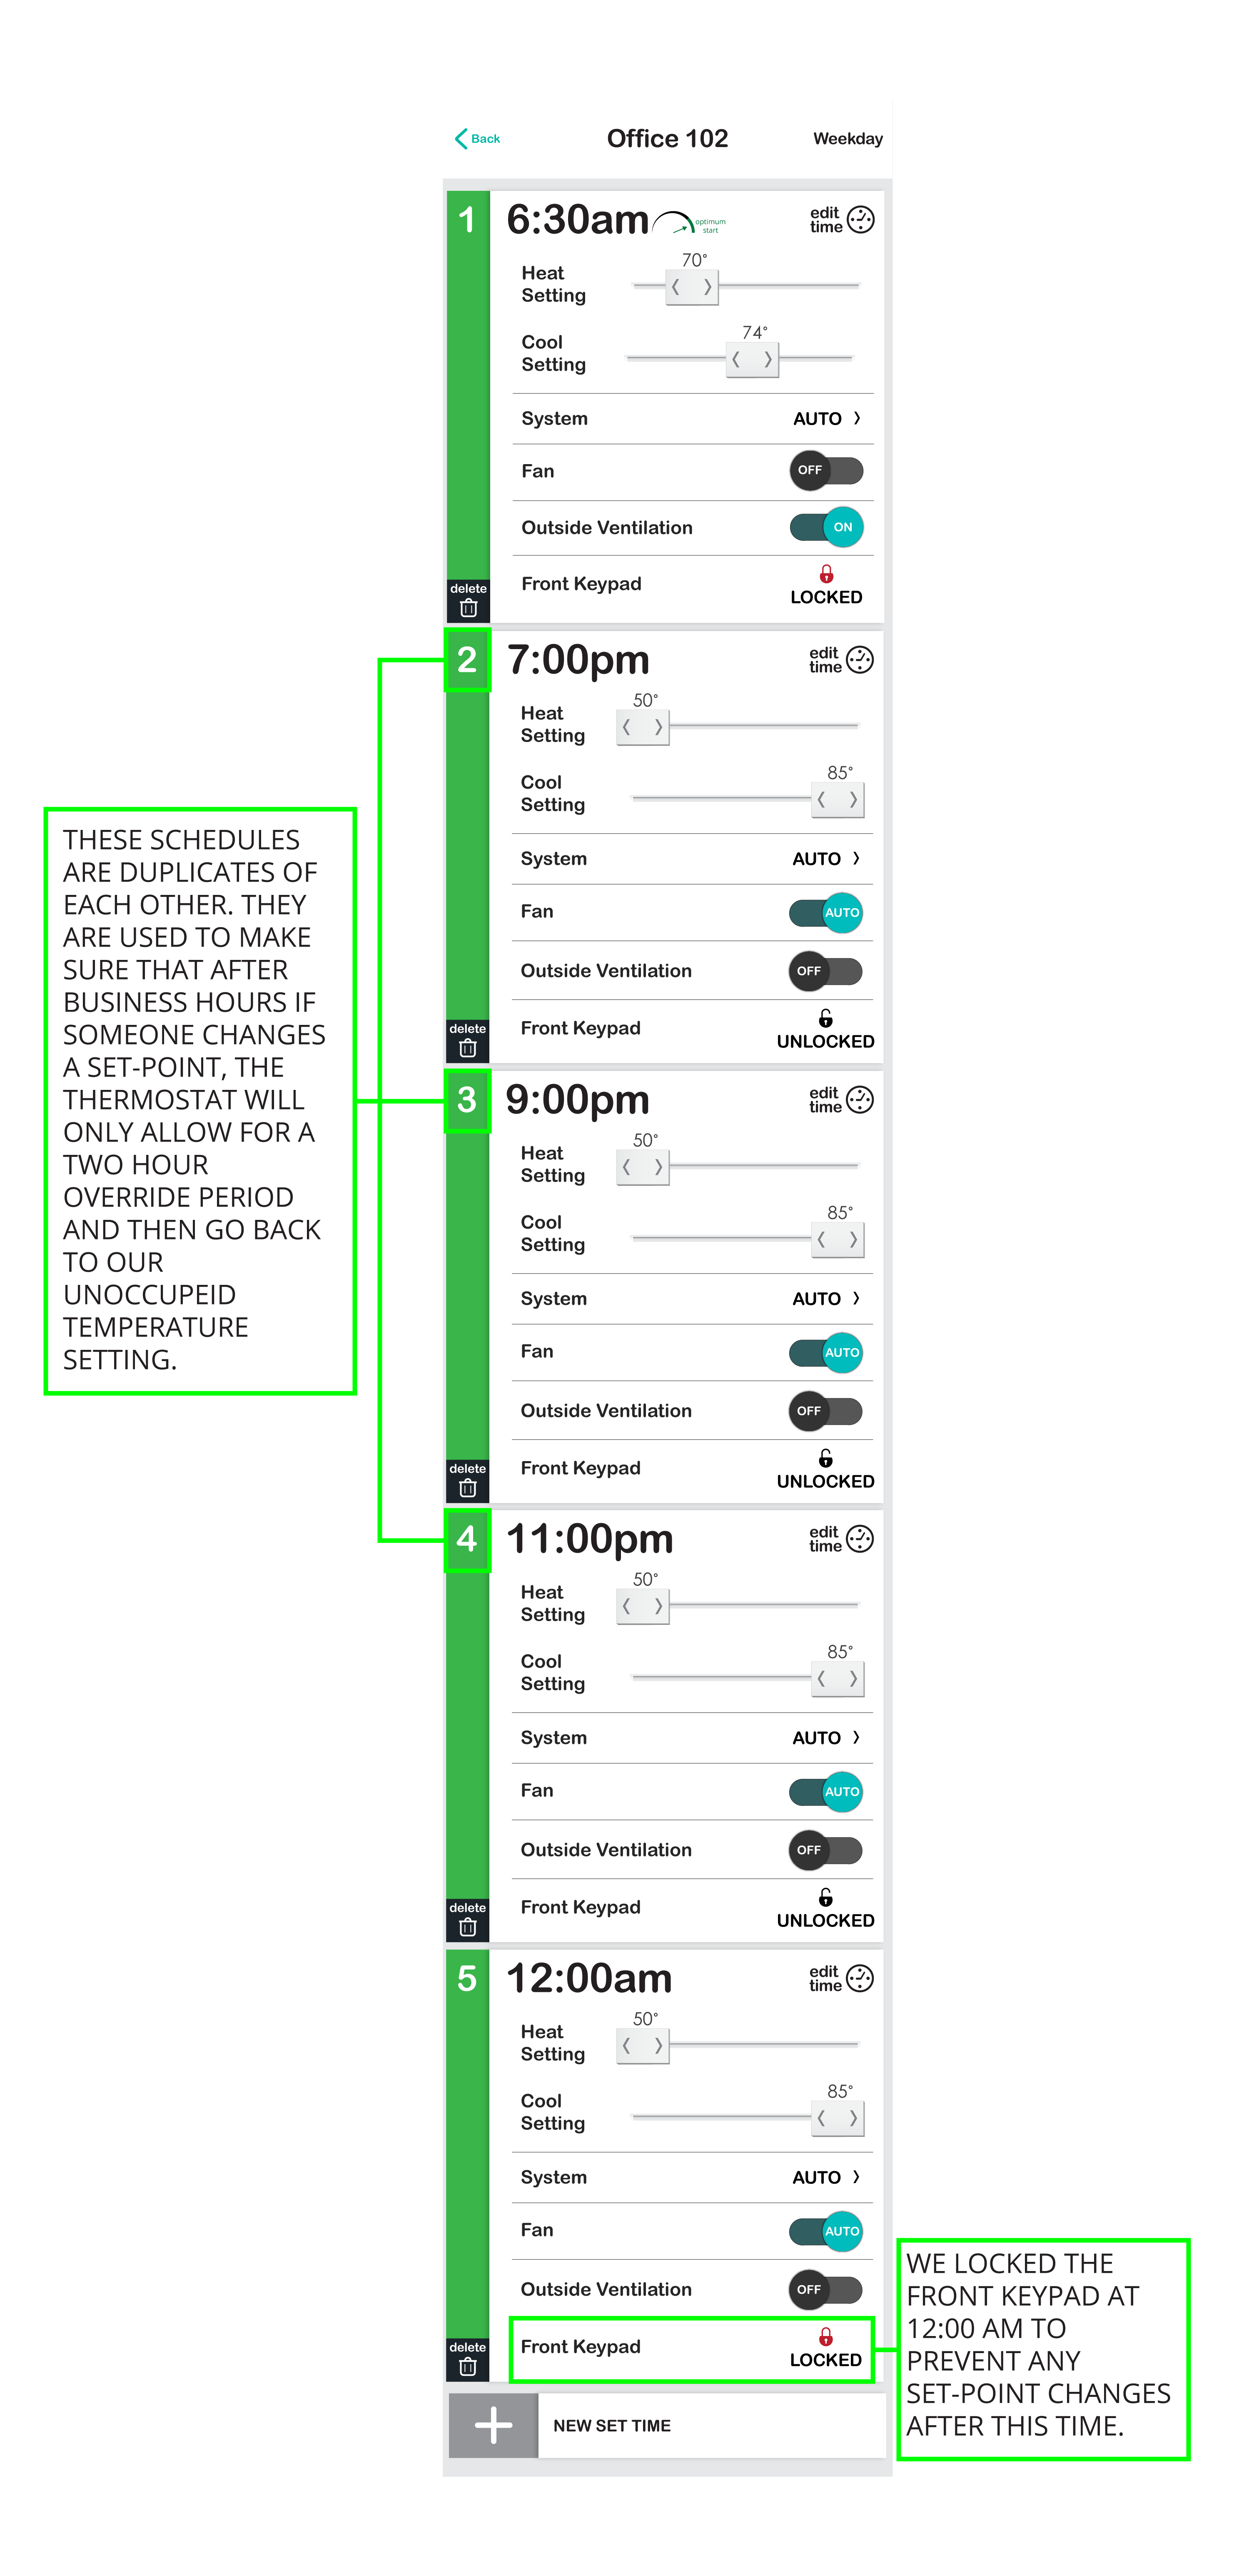
7. In this example, we want to allow people to adjust the thermostat’s temperature settings after 7:00 PM, but automatically set the thermostat back to the unoccupied temperature settings at 9:00 PM, 11:00 PM, and 12:00 AM to prevent running the HVAC unit all night. At 12:00 AM we then lock the thermostat’s keypad so the thermostat stays in unoccupied mode until the room becomes occupied again at 6:30 AM. To do these we add in addition Set Times by pressing the + New Set Time button and adjusting these new set-times to correlate with our additional setback hours (9:00 PM, 11:00 PM, and 12:00 AM). For the 9:00 PM and 11:00 PM we set identical to our 7:00 PM unoccupied schedule time. For the 12:00 AM we set identical unoccupied schedule temperatures at our 7:00 PM, but change the Front Keypad to LOCKED. An example of this can be seen below:

8. This process can be used to allow temporary adjustments at anytime through-out the day. A thermostat’s schedule allows for up to 12 schedules to accommodate the variety of different schedule times you would like to set.
9. Once you are done editing you schedule, press the back button in the upper left hand corner of your screen. The adjustments you have made will be pushed to your room thermostats.


